How To Start A Redmon Worm Farm In Easy Steps
Introduction
Worm farming, also known as vermicomposting, is a great way to reduce your food waste and create nutrient-rich compost for your garden. Worms are voracious eaters and can consume a wide variety of food scraps, including fruits, vegetables, coffee grounds, and eggshells. Their waste, known as worm castings, is a valuable soil amendment that can improve the drainage, aeration, and fertility of your soil.
If you're interested in starting a worm farm, Redmon worm farms are a great option. They are easy to set up and maintain, and they can produce a significant amount of worm castings. In this blog post, we will walk you through the steps on how to start a Redmon worm farm in easy steps.
What You Will Need
To start a Redmon worm farm, you will need the following items:
- A Redmon worm farm kit
- Red wiggler worms
- Bedding material (such as shredded newspaper, cardboard, or leaves)
- Food scraps
- Water
- A spray bottle
- A thermometer
- A measuring cup
Step 1: Choose a Location
Your worm farm should be placed in a cool, dark location that is out of direct sunlight. A basement, garage, or closet are all good options.
Step 2: Set Up Your Worm Farm
Once you have chosen a location, follow the instructions that come with your Redmon worm farm kit to set it up. The kit will come with all of the necessary materials, including a bin, a drainage tray, and a lid.
Step 3: Add Bedding Material
The next step is to add bedding material to your worm farm. Bedding material helps to keep the worms moist and provides them with a place to live. You can use shredded newspaper, cardboard, or leaves as bedding material.
Step 4: Add Red Wiggler Worms
Once you have added the bedding material, it's time to add the worms. You can purchase red wiggler worms from a local nursery or online. Red wiggler worms are the most common type of worm used for vermicomposting.
Step 5: Add Food Scraps
Once you have added the worms, you can start adding food scraps. You can add a variety of food scraps to your worm farm, including fruits, vegetables, coffee grounds, and eggshells.
Step 6: Water Your Worm Farm
Your worm farm should be kept moist, but not soggy. Water your worm farm once a week or as needed. You can use a spray bottle to water your worm farm.
Step 7: Monitor Your Worm Farm
It's important to monitor your worm farm to make sure that it is healthy and thriving. Check your worm farm regularly to make sure that the bedding material is moist and that the worms are active.
Step 8: Harvest Your Worm Castings
After a few months, you will be able to harvest your worm castings. Worm castings are a valuable soil amendment that can improve the drainage, aeration, and fertility of your soil. You can use worm castings in your garden or potted plants.
Conclusion
Starting a Redmon worm farm is a great way to reduce your food waste, create nutrient-rich compost, and improve the health of your garden. By following the steps outlined in this blog post, you can easily start your own worm farm and enjoy the many benefits that it has to offer.
If you are interested in learning more about Redmon Worm Farm, please visit their website at Home Gardening. They have a wealth of information about worm farming, including how to start a worm farm, how to care for your worms, and how to use worm castings. You can also purchase worms and worm bins from their website.
FAQ of redmon worm farm
- What is a Redmon worm farm?
A Redmon worm farm is a plastic bin that is specifically designed for vermicomposting, which is the process of using worms to break down organic matter into a nutrient-rich fertilizer called worm castings. The Redmon worm farm has a number of features that make it ideal for vermicomposting, including aeration holes, a drainage system, and a removable lid.
- What are the benefits of using a Redmon worm farm?
There are many benefits to using a Redmon worm farm, including:
* It is a great way to reduce your food waste.
* It produces nutrient-rich fertilizer that can be used to improve your garden soil.
* It is a relatively low-maintenance way to compost.
* It can be used indoors or outdoors.
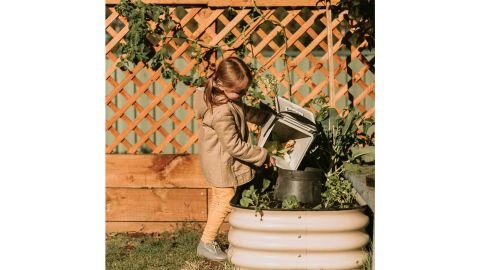
* It is a fun and educational activity for kids.
- How do I set up a Redmon worm farm?
Setting up a Redmon worm farm is relatively simple. You will need to:
* Acquire a Redmon worm farm.
* Prepare the bedding. You can use a variety of materials, such as shredded newspaper, cardboard, or coconut coir.
* Add the worms. You can purchase worms from a local nursery or online retailer.
* Start feeding the worms. You can feed them a variety of kitchen scraps, such as fruits, vegetables, and coffee grounds.
* Be sure to aerate the bin regularly. You can do this by poking holes in the bedding or using an aerator.
* Harvest the castings when they are ready. You can use them to fertilize your plants.
- What are some common problems with Redmon worm farms?
Some common problems with Redmon worm farms include:
* Overfeeding the worms. This can lead to anaerobic conditions, which can kill the worms.
* Not aerating the bin regularly. This can also lead to anaerobic conditions.
* Not providing enough bedding. This can lead to the worms becoming stressed.
* Not harvesting the castings regularly. This can lead to the castings becoming too wet and smelly.
- How can I troubleshoot problems with my Redmon worm farm?
If you are having problems with your Redmon worm farm, there are a few things you can do to troubleshoot the issue:
* Check the bedding. If it is too wet or dry, adjust the amount of water you are adding.
* Check the aeration. If the bin is not aerated properly, poke some holes in the bedding or use an aerator.
* Check the feeding. If you are overfeeding the worms, reduce the amount of food you are giving them.
* Check the harvesting. If you are not harvesting the castings regularly, start doing so.
Image of redmon worm farm
10 different images of redmon worm farm that are free to use:
- A worm farm made from a plastic bin. The bin is filled with bedding material, such as shredded newspaper or leaves, and there are worms visible in the bedding.

- A worm farm made from a wooden pallet. The pallet has been drilled with holes to allow for ventilation, and it is filled with bedding material and worms.
- A worm farm made from a stack of plastic buckets. The buckets are drilled with holes and stacked on top of each other, with the bottom bucket filled with bedding material and worms.

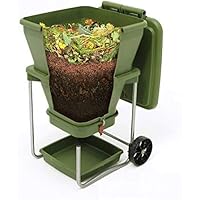
- A worm farm made from a worm bin kit. The kit includes a plastic bin, a drainage system, and a lid. The bin is filled with bedding material and worms, and the drainage system helps to keep the bin moist.

- A worm farm made from a worm tower. The worm tower is made from a series of plastic trays that are stacked on top of each other. The trays are drilled with holes to allow for ventilation, and they are filled with bedding material and worms.

- A worm farm made from a worm bag. The worm bag is made from a mesh material that allows for ventilation and drainage. The bag is filled with bedding material and worms, and it can be hung from a hook or placed on a shelf.

- A worm farm made from a worm bin with a window. The worm bin has a clear window in the side, so you can see the worms working. The bin is filled with bedding material and worms, and it has a drainage system to keep the bin moist.

- A worm farm made from a worm bin with a spigot. The worm bin has a spigot at the bottom, so you can easily drain the liquid fertilizer that the worms produce. The bin is filled with bedding material and worms, and it has a ventilation system to keep the bin moist.
- A worm farm made from a worm bin with a thermometer. The worm bin has a thermometer in the side, so you can monitor the temperature of the bin. The bin is filled with bedding material and worms, and it has a ventilation system to keep the bin moist.

- A worm farm made from a worm bin with a humidity gauge. The worm bin has a humidity gauge in the side, so you can monitor the humidity of the bin. The bin is filled with bedding material and worms, and it has a ventilation system to keep the bin moist.

Post a Comment for "How To Start A Redmon Worm Farm In Easy Steps"